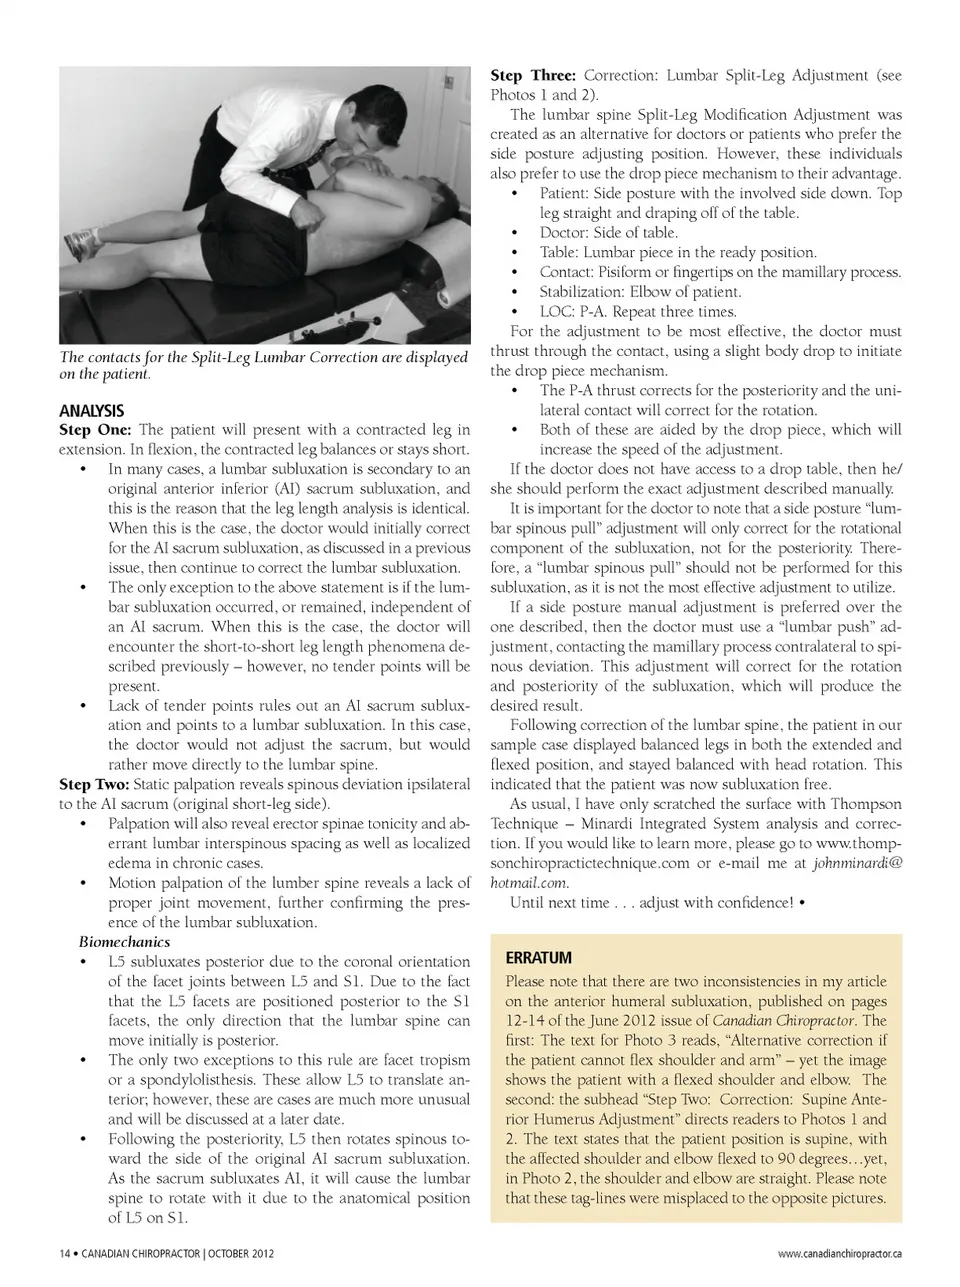
The contacts for the Split-Leg Lumbar Correction are displayed on the patient. ANALYSIS Step One: The patient will present with a contracted leg in extension. In flexion, the contracted leg balances or stays short. • In many cases, a lumbar subluxation is secondary to an original anterior inferior (AI) sacrum subluxation, and this is the reason that the leg length analysis is identical. When this is the case, the doctor would initially correct for the AI sacrum subluxation, as discussed in a previous issue, then continue to correct the lumbar subluxation. • The only exception to the above statement is if the lum-bar subluxation occurred, or remained, independent of an AI sacrum. When this is the case, the doctor will encounter the short-to-short leg length phenomena de-scribed previously – however, no tender points will be present. • Lack of tender points rules out an AI sacrum sublux-ation and points to a lumbar subluxation. In this case, the doctor would not adjust the sacrum, but would rather move directly to the lumbar spine. Step Two: Static palpation reveals spinous deviation ipsilateral to the AI sacrum (original short-leg side). • Palpation will also reveal erector spinae tonicity and ab-errant lumbar interspinous spacing as well as localized edema in chronic cases. • Motion palpation of the lumber spine reveals a lack of proper joint movement, further confirming the pres-ence of the lumbar subluxation. Biomechanics • L5 subluxates posterior due to the coronal orientation of the facet joints between L5 and S1. Due to the fact that the L5 facets are positioned posterior to the S1 facets, the only direction that the lumbar spine can move initially is posterior. • The only two exceptions to this rule are facet tropism or a spondylolisthesis. These allow L5 to translate an-terior; however, these are cases are much more unusual and will be discussed at a later date. • Following the posteriority, L5 then rotates spinous to-ward the side of the original AI sacrum subluxation. As the sacrum subluxates AI, it will cause the lumbar spine to rotate with it due to the anatomical position of L5 on S1. 14 • CANADIAN CHIROPRACTOR | OCTOBER 2012 Step Three: Correction: Lumbar Split-Leg Adjustment (see Photos 1 and 2). The lumbar spine Split-Leg Modification Adjustment was created as an alternative for doctors or patients who prefer the side posture adjusting position. However, these individuals also prefer to use the drop piece mechanism to their advantage. • Patient: Side posture with the involved side down. Top leg straight and draping off of the table. • Doctor: Side of table. • Table: Lumbar piece in the ready position. • Contact: Pisiform or fingertips on the mamillary process. • Stabilization: Elbow of patient. • LOC: P-A. Repeat three times. For the adjustment to be most effective, the doctor must thrust through the contact, using a slight body drop to initiate the drop piece mechanism. • The P-A thrust corrects for the posteriority and the uni-lateral contact will correct for the rotation. • Both of these are aided by the drop piece, which will increase the speed of the adjustment. If the doctor does not have access to a drop table, then he/ she should perform the exact adjustment described manually. It is important for the doctor to note that a side posture “lum-bar spinous pull” adjustment will only correct for the rotational component of the subluxation, not for the posteriority. There-fore, a “lumbar spinous pull” should not be performed for this subluxation, as it is not the most effective adjustment to utilize. If a side posture manual adjustment is preferred over the one described, then the doctor must use a “lumbar push” ad-justment, contacting the mamillary process contralateral to spi-nous deviation. This adjustment will correct for the rotation and posteriority of the subluxation, which will produce the desired result. Following correction of the lumbar spine, the patient in our sample case displayed balanced legs in both the extended and flexed position, and stayed balanced with head rotation. This indicated that the patient was now subluxation free. As usual, I have only scratched the surface with Thompson Technique – Minardi Integrated System analysis and correc-tion. If you would like to learn more, please go to www.thomp-sonchiropractictechnique.com or e-mail me at johnminardi@ hotmail.com. Until next time . . . adjust with confidence! • ERRATUM Please note that there are two inconsistencies in my article on the anterior humeral subluxation, published on pages 12-14 of the June 2012 issue of Canadian Chiropractor . The first: The text for Photo 3 reads, “Alternative correction if the patient cannot flex shoulder and arm” – yet the image shows the patient with a flexed shoulder and elbow. The second: the subhead “Step Two: Correction: Supine Ante-rior Humerus Adjustment” directs readers to Photos 1 and 2. The text states that the patient position is supine, with the affected shoulder and elbow flexed to 90 degrees…yet, in Photo 2, the shoulder and elbow are straight. Please note that these tag-lines were misplaced to the opposite pictures. www.canadianchiropractor.ca
Chiropractic + Naturopathic Doctor October 2012: Page 14